Urban Chicken Coop™ Supplemental Instructions

The Urban Chicken Coop™ and its design are Patent Pending.
All rights reserved.
V 1.1 Summer 2022
updated 6/7/2022 4:00 pm
Foreword: We’ve put 10’s of thousands of hours into bringing new products to market and we’re particularly excited about the new Urban Chicken Coop™.
We at Roost & Root sincerely thank you for your purchase and hope that you’ll be as proud as we are of your new coop when it’s done. To follow are some useful links, topical videos, setup instructions and some guidance on using your new coop.
Full Length YouTube Assembly Video
This is an hour long video 🙁 but I’ll bet you a cold beer (or root beer) it saves you an hour… and a lot of frustration 🙂
Supplemental Videos & Instructions
Watch this video (has audio) for a demonstration on how to put the egg box unit in…
This video has audio…
This video has audio…
This video has audio…
Let the following statements guide you on where to place your new coop given your situation and locale.
- Fully feathered standard chickens are very cold tolerant. They regularly tolerate sub zero temperatures. They’re actually more susceptible to heat and poor ventilation than they are cold and wet ground. The clear roof is cool on hot days but some extra shade is good. It lets natural light in which chickens need. You’d also want some full sunlight to help dry out the ground during rainy periods. Near or under a tree can work out well. Or between structures that cast shade during some parts of days. If no shade is available, that is okay too… but chickens may stay more in the back part of the coop during very hot direct sunlight periods. That would be perfectly normal.High ground is key to drainage. Don’t put in a low spot. Some wind protection would be a good idea… like near a house, or a shed, or a fence. Like in general… you wouldn’t want to put out into the middle of a field.
- Close water access. You’ll need to fill the waterer every 3 days or so depending on the number of birds and how hot it is.
- Also make sure food is nearby so that’s not too much of a hassle. Food seems to last about a day or so longer than the water…. but it’s good for it to be handy.
- Where you can see them! The eggs are great, but just watching and observing chickens do their thing is 99% of the fun. This coop was made with great views for the purpose of watching your hens.
- Enough room behind the coop to collect eggs and to be able to remove the egg box unit to clean it… and to rake out the coop from time to time. You should expect to rake out the coop every 3-4 weeks depending on the soil microbe activity in your area and time of year… composting the chicken poop.
- Putting your coop directly on the grass is fine. After a couple of days… between munching on and trampling the grass… it will be no more. You will have a perfect egg shaped dirt spot in your yard 🙂 Fun!
- If you plan to use a heater in the waterer in the winter to afford some freeze protection, you may keep in mind being near a plug.
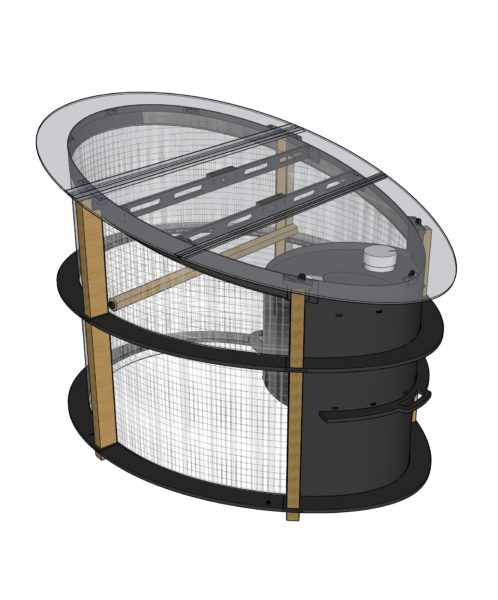
The Urban Chicken Coop™ was made lightweight so that it could be easily moved by two people. Some people move their coops seasonally, or like to take them into the garage during a storm. Especially those in hurricane prone areas.
Holes are provided on the bottom rails of the coop to stake it down. In harder or clay soils the 8″ standard stakes will do the job. In softer soils or places where winds are known to be higher, our optional longer 12″ stakes should be used.
In rare places, where winds often are in excess of 50-60 mph you might even special order some longer 24″ long stakes from Amazon assuming your ground is soft enough to drive that deep.
If you expect sustained winds greater than 60 MPH you should move your coop to a protected area.
Stakes should be driven into the ground at a slight angle to the coop so as to provide more holding power. The holes in the bottom ring are oblong to allow for this.
Leave some of the stake head exposed so you can pull out if you need to.
If you’d like to discuss more advanced methods of anchoring your coop, feel free to call us before or after the sale and we are happy to consult with you.
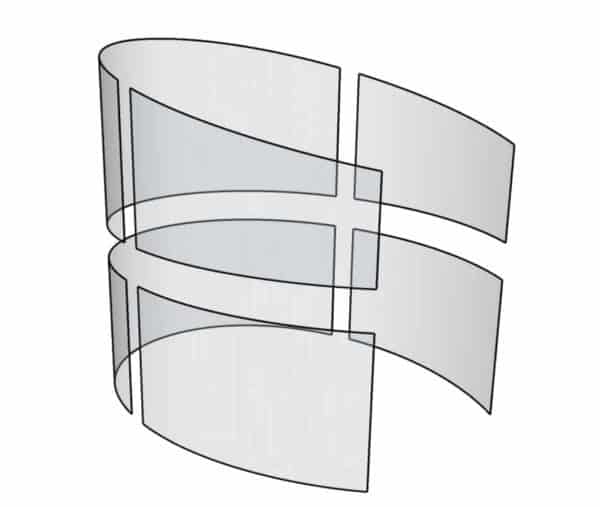
Storm panels are used to provide extra protection for your chickens during very rainy or sub 15° F cold spells.
Storm panels come as a 6 panel set and use 3D Printed clips to attach to the wire in sections.
On occasion when it get very cold in the day but warms up at night, only use the top half of the set giving the hens protection on their roost at night, but during the day, they can be in the breeze and scavenge around on the ground.
Storm panels are not designed to be 100% rain or snow tight. They allow some breathing by design and some water and snow will get by but won’t be a problem for your chickens.
![]()
This video has audio…
![]()
These videos have audio…
MAINTENANCE & EXTERIOR CLEANING – None of the parts to your coop require any special maintenance. Everything can be washed with a mild soap for aesthetic reasons. The egg box should be kept reasonably clean for flock health reasons and smell.
REMOVING THE EGG BOX – To remove the egg box… (1) open the roof and remove the upper egg box clip by reaching inside (2) open the turn out door and remove the lower egg box clip (3) remove the waterer, feeder and eggbox lid (4) first push the unit forward to release from the locking tabs (5) lift, twist, and tilt the unit until it will clear and remove.
You can wash the egg box with a garden hose and sprayer and repeat the procedure in reverse to reinstall. See video below.
RAKING THE GROUND – With the egg box removed, use a small rake (shrub rake) to rake the ground towards the back of the coop and then scoop out droppings. Chicken poop on the ground decomposes into dirt pretty fast so it really does not look like anything other than dirt. This dirt is an amazing soil supplement. Use sparingly. It’s strong.
If you use shavings, the procedure is the same. If you smell an ammonia smell you must change the shavings or use a commercial bedding supplement designed to kill the ammonia smell. If you can smell ammonia, it’s already creating harm to your hens.
We recommend letting the chickens live directly on soil. Best is what is commonly referred to as “sandy loam”. But the ground you have will be fine.
CLEANING THE ROOF – There’s no longevity reason to clean the roof, it will last 15+ years in direct sunlight. For aesthetic reasons, you can wash with a mild soap and rinse with clean water. Spray a garden hose in the flutes from the side to clean those out. A pressure washer on a low pressure setting can also be used. Just be careful and go at it easy.
ROOF LEAKS – The rood is designed to be mostly water tight but a drip or two can get by. It is not recommend to do anything about small drips.
STAINING THE LEGS – The cedar legs are best left natural. They are rot resistant, insect resistant and will last many years just as they are. If you decide to stain or color stain them, use a no VOC product that stains but does not seal the wood. It needs to be able to breathe. The issue with painting is that pinholes will develop. Moisture will get into a pinhole and then trap the moisture under the skin of the paint.
TURNOUT – After about 2 weeks, your chickens will instinctively call your new coop home. If turned out to eat bugs in the day, or just stretch, they will return just before dusk to roost. A six foot yard fence will keep all but the most gymnastic chicken in your yard. Hens seldom will go more than 100 feet or so from their source of food, water and safety. Just remember to close the door at night.
LOCKING THE TURNOUT DOOR – You can use one of the carabiner clips to lock the turnout door.
FEEDER – The feeder will work with either pellets or crumbles. Either can become jammed in too humid of weather and a quick shake at egg collection time will keep things flowing. Some expensive organic feeds actually clump (clog) worse as they don’t have anti-caking agents in them. Any good feed will work with your hens. Make sure to use a “layer” feed if you’re going after eggs. We do not recommend “scratch” feed unless you just toss it on the ground maybe as a treat.
WATER – Keep the waterer filled with clean potable water. Chickens peck at the poultry nipple that hangs down under the egg box. If the nipple gets a grain of debris in it, it may drip. Just actuate it vigorously and flush it out. It should work for several years before needing to be replaced.
The standard poultry nipple will freeze pretty quickly at around 30°F. Our Patented No-Freeze Poultry Nipple will keep water flowing down to 0°F along with a small typical fish tank heater and cord cover.
A LITTLE MORE ABOUT THE ROOST BAR – More information about the position of the roost bar. In particular, if you have bantam breeds like Silkies, you will need to lower it.
EGG COLLECTION & LOCKING DOWN ROOF – The egg shaped lid on the top of the egg box keeps the egg box dark and aids in the chickens actually using the egg box for laying. Remove it to collect eggs and keep it in place when done.
That’s it… call 877-741-COOP with any questions about your new coop, or advice on chicken keeping!


