

If you plan on adjusting something, you’ll benefit from reading these instructions…
V2.0 (Updated April 2026)
Quick Look | Two types of charge controllers…
See section 2 for detailed info on each charge controller.
Any special notes related to your type of controller are noted in the remainder of the instructions.
1. Activating the AVM system…
![]() You can skip if you’ve already activated your system during assembly.
You can skip if you’ve already activated your system during assembly.
Before proceeding, (1) the fan panel should be mounted, the solar panel should be mounted but not plugged in, (3) the controller panel should be mounted, (4) the main controller cable should be routed and secured but not plugged in on either end. See the Assembly Instructions provided with your product for these steps as it is part of the main assembly.
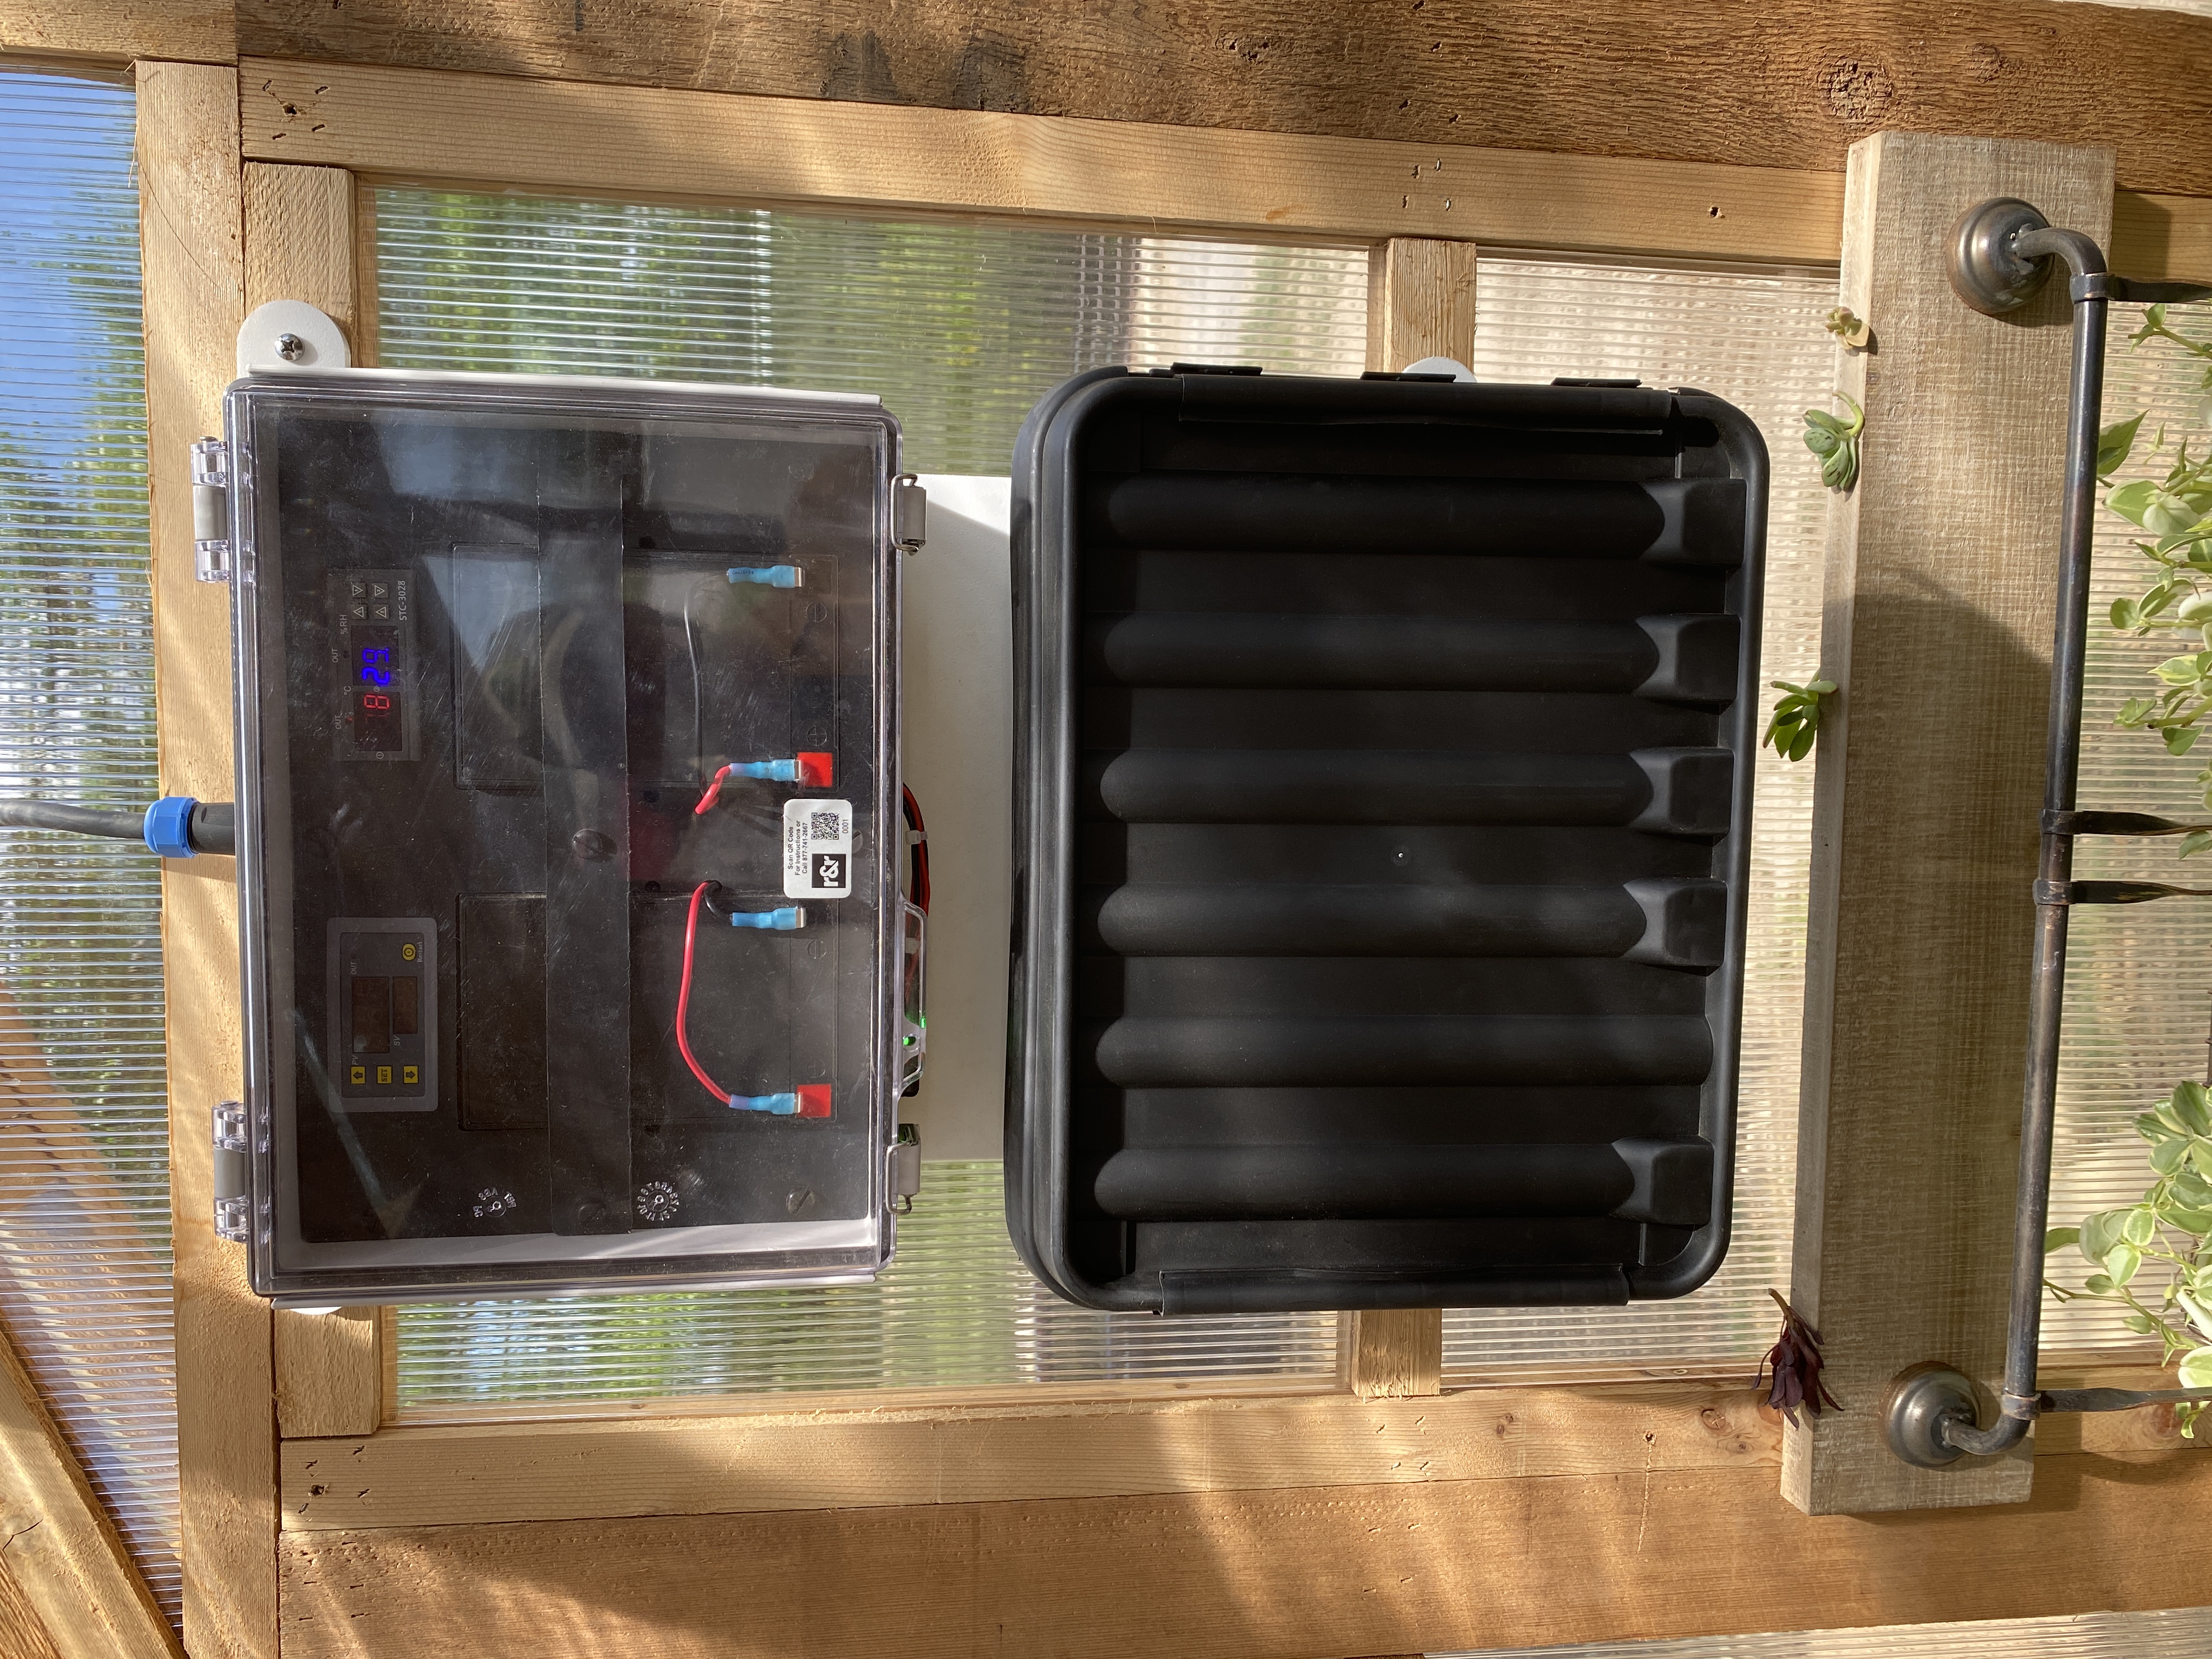
1. We pre-charged your batteries. The unit is shipped with the positive ( Red +) leads of the batteries removed. Remove the protective covers from the Red + side of the battery terminal (either one is fine) and firmly push the red wire terminal onto the Red + battery spade. Repeat for the other battery. This will turn on the timer, temp & humidity controllers and activate the solar charge controller.
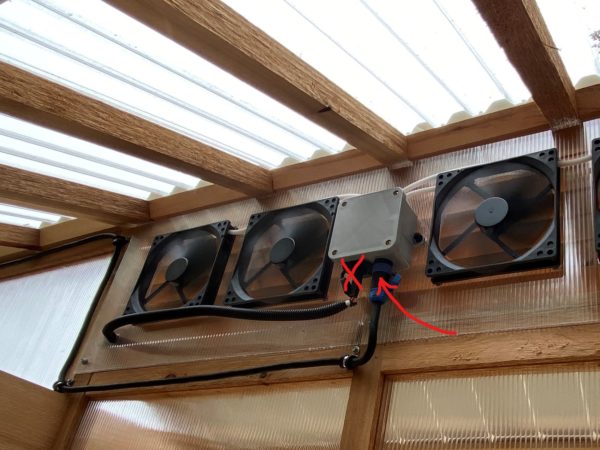
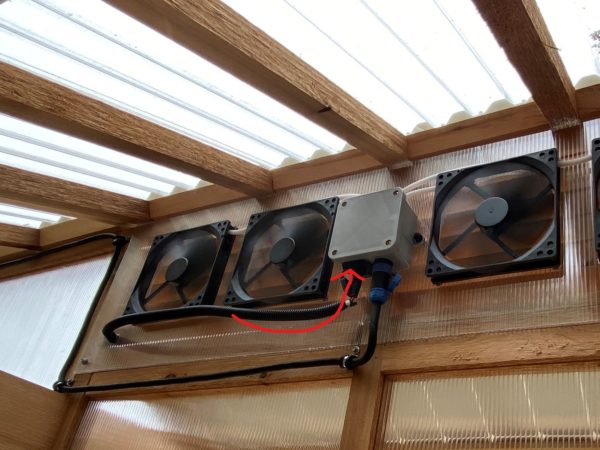
2. From a ladder, connect the 4 pin main connector cable to the 4 pin connector on the bottom of the fan panel junction box as illustrated below. Unscrew the cap from the connector if so installed. Take care to rotate the connector until it is properly indexed, gently push in to engage pins then lightly tighten. Just finger tight is fine. Do not plug in the solar panel to its 2 pin outlet yet. See below note for other models.
![]() For the XL Slant Roof Greenhouse you will plug the control cable into both fan panels. For either the Heritage 90 or Heritage 150 this step applies to the back wall grey junction box. Again, do not hook in solar panels as of yet.
For the XL Slant Roof Greenhouse you will plug the control cable into both fan panels. For either the Heritage 90 or Heritage 150 this step applies to the back wall grey junction box. Again, do not hook in solar panels as of yet.
3. Using the same technique, next, connect the 4 pin main connector cable to the 4 pin connector on the top of the controller box as illustrated below. Depending on conditions when you complete this step, your fans may indeed start running.
4. Back on the ladder, carefully (especially if fans are now running) connect the 2 pin connector from the solar panel to the 2 pin outlet on the bottom of the fan panel junction box taking care to make the female to male sides match up.
En voilà. It’s activated. The solar panel will charge the batteries daily, a solid state charge controller manages the power, and the two digital controllers activate the fans as pre-programmed.
![]() For the XL Slant Roof Greenhouse you will plug both solar panels into their fan panel. Order is not important. For the Heritage 90 you will plug in the one solar panel to the back wall rear junction box and for the Heritage 150 you will plug in both solar panels. Order is not important. Plugs only go in one way.
For the XL Slant Roof Greenhouse you will plug both solar panels into their fan panel. Order is not important. For the Heritage 90 you will plug in the one solar panel to the back wall rear junction box and for the Heritage 150 you will plug in both solar panels. Order is not important. Plugs only go in one way.
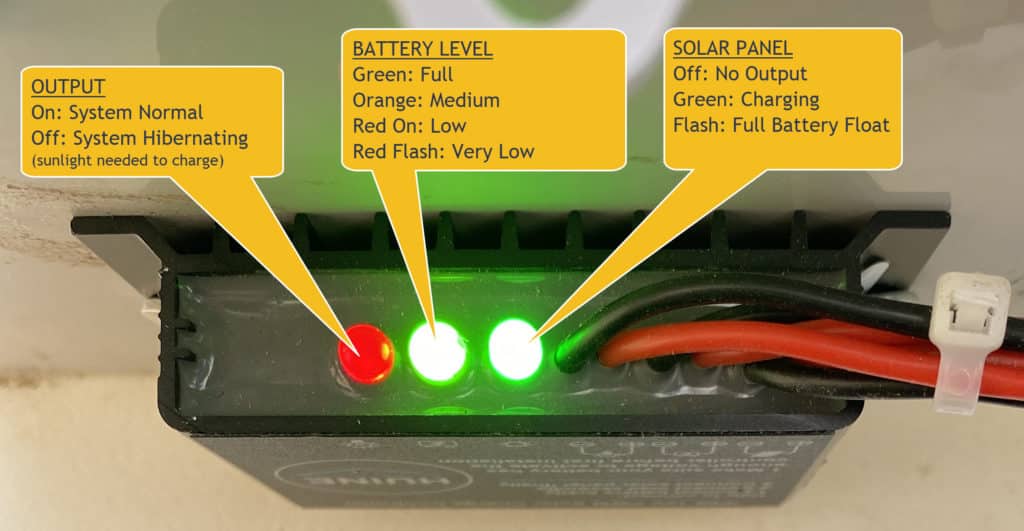
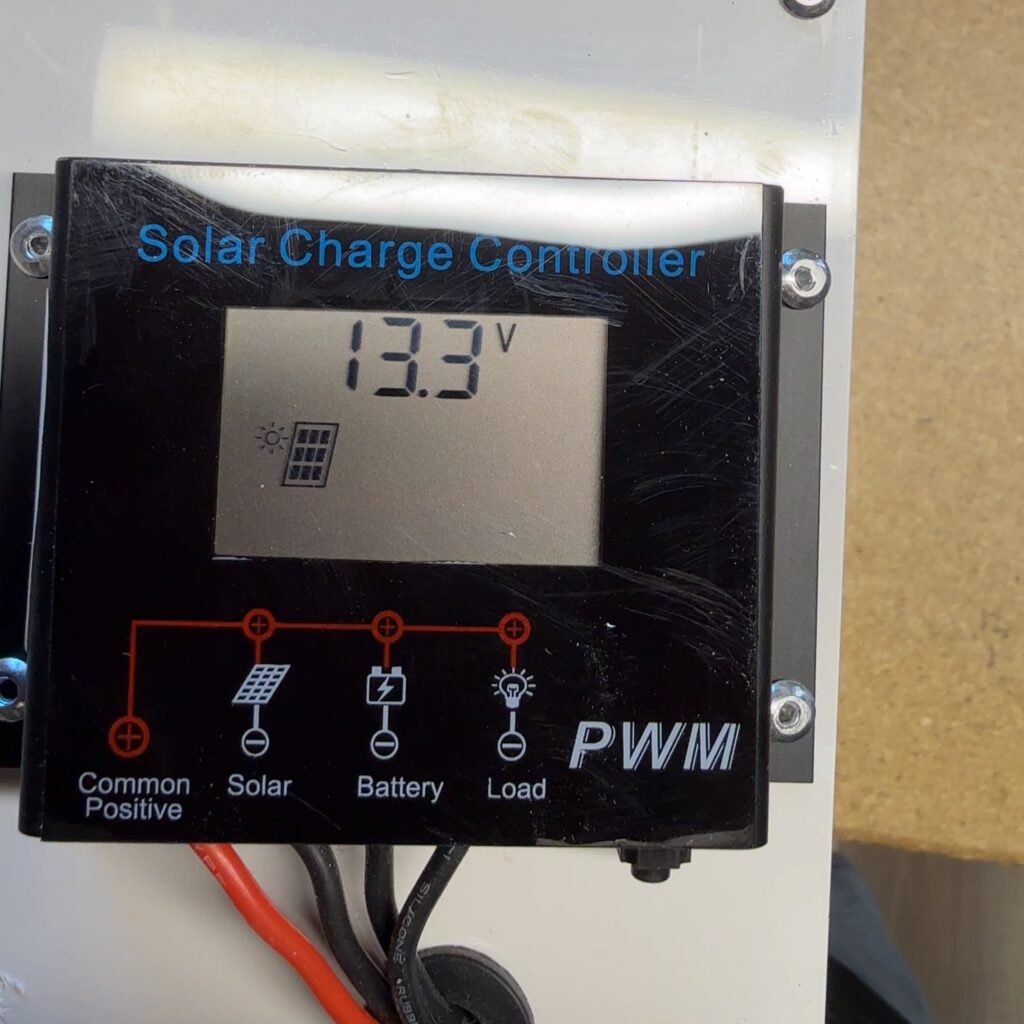
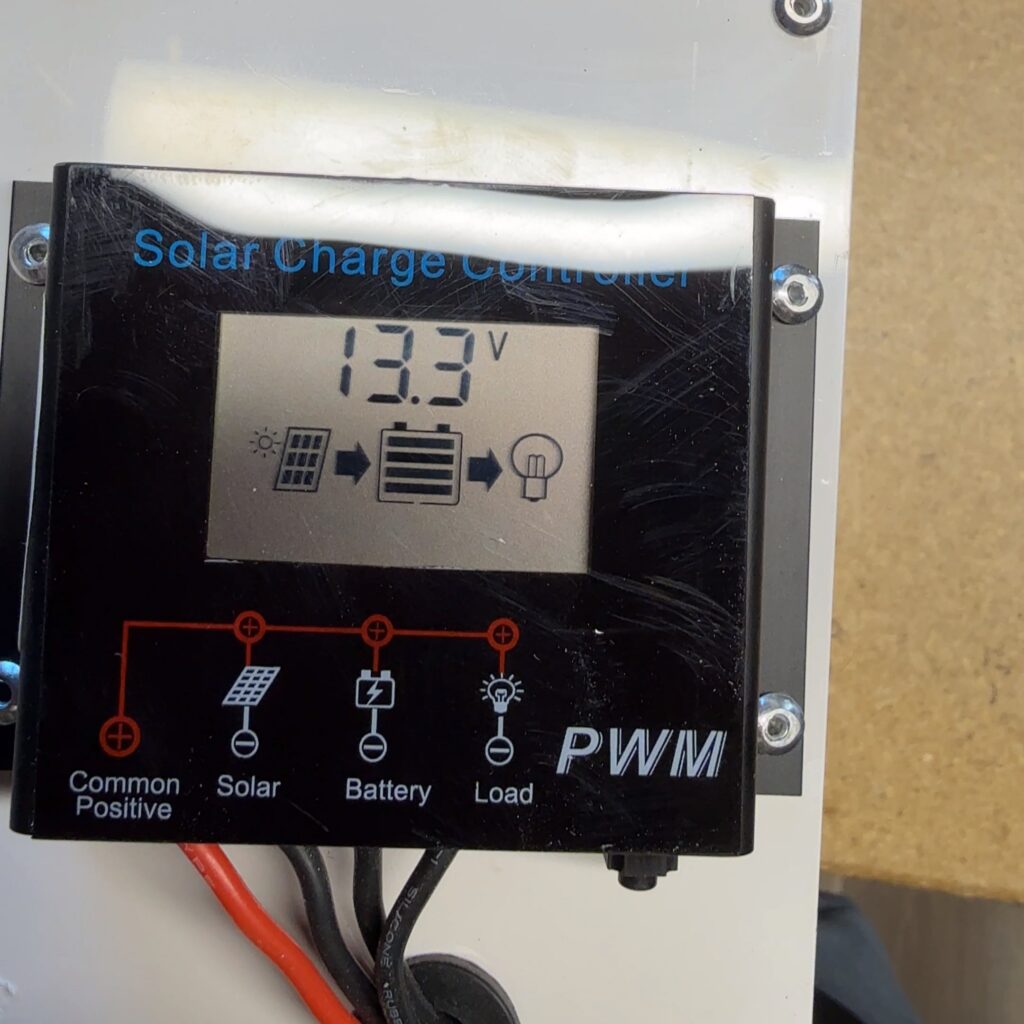
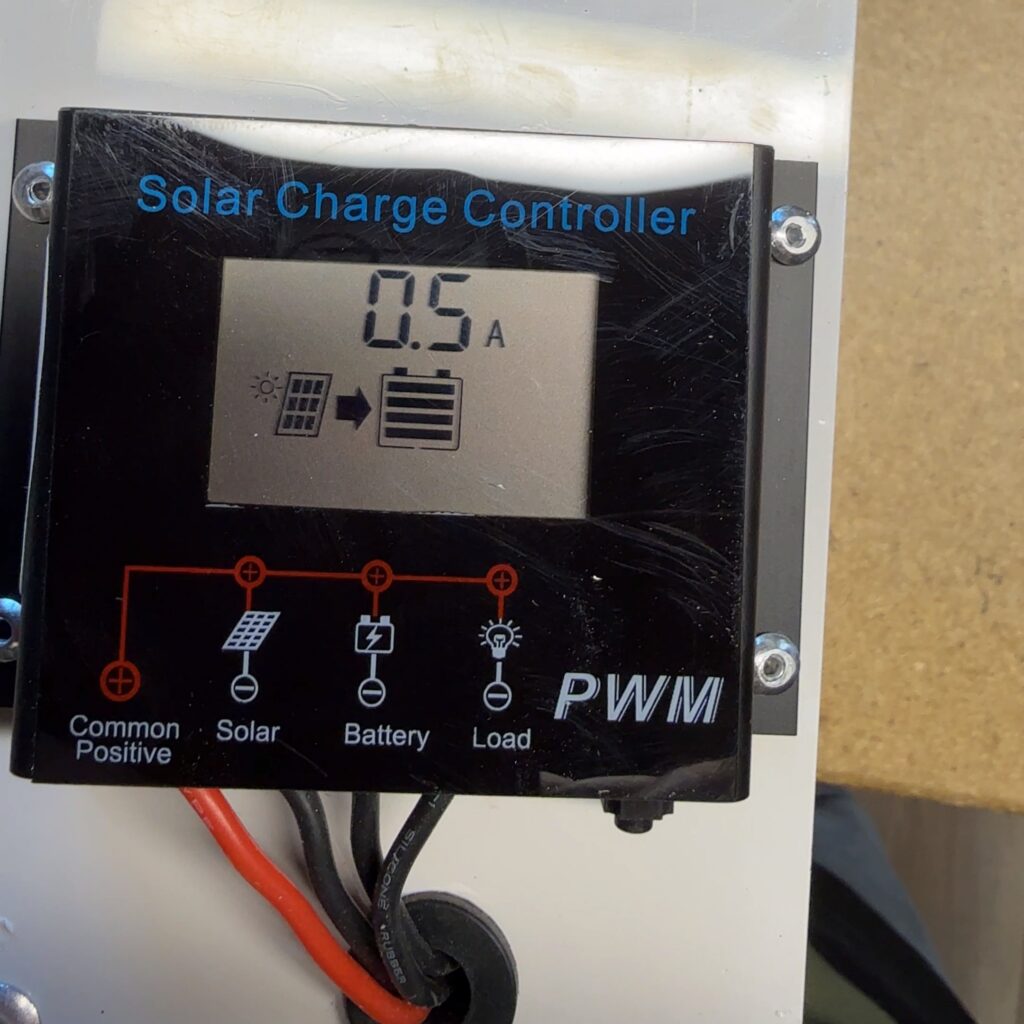
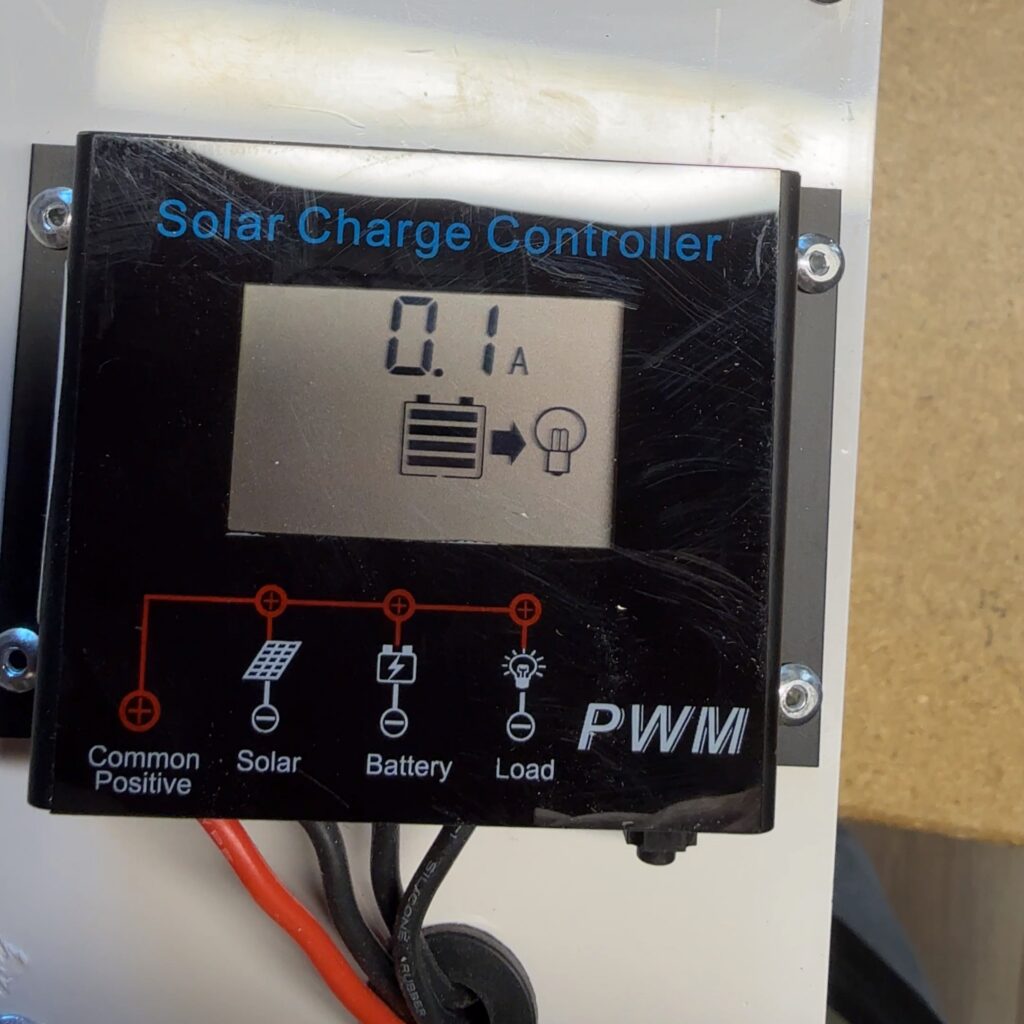
2. Understanding Charge Controller Status Indicators
![]() To little light will cause the system to “hibernate” to protect the batteries from discharging too low and reducing their lifespan. When the batteries become charged
To little light will cause the system to “hibernate” to protect the batteries from discharging too low and reducing their lifespan. When the batteries become charged
sufficiently after hibernation occurs, the system returns to its normal operation without you doing anything.
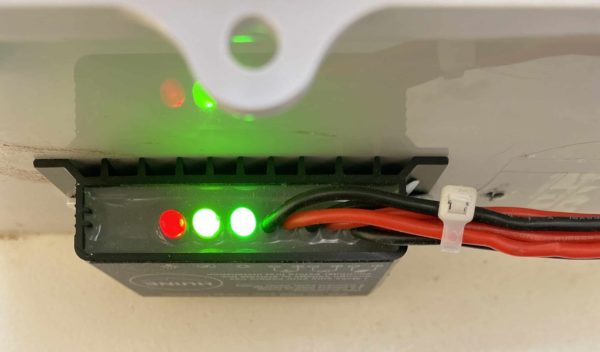
RIGHT LIGHT | OFF: Solar Panel Disconnected | CONSTANT ON GREEN: Charging | SLOW FLASH: Float Charge (maintain batteries)
MIDDLE LIGHT | GREEN: Battery Full Charge | ORANGE: Battery Medium Charge | RED ON: Battery Low Charge | RED FLASH: Battery Very Low
LEFT LIGHT | RED ON: Output Normal | OFF: System is in hibernation | SLOW FLASH: Overload | FAST FLASH: Short-Circuit
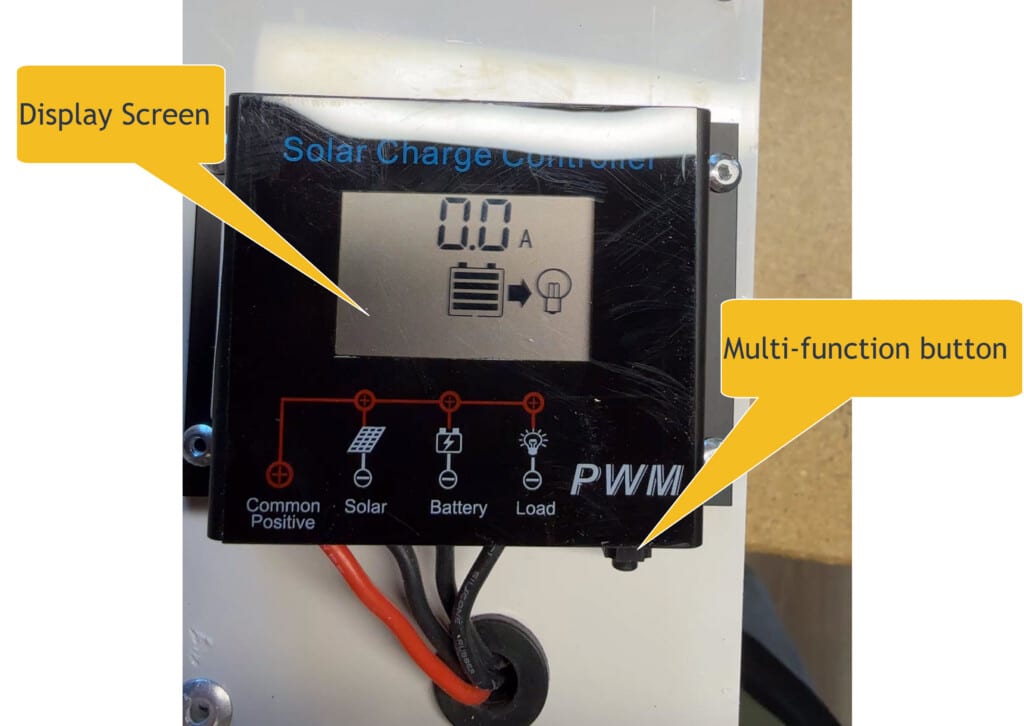
The newer Type 2 Controller will during operation cycle through various screens and provide visual information about its operation. You have to be a little quick to spot it, but it comes around again. We set all the needed parameters before your AVM leaves the shop. We do not recommend that you adjust anything in the controllers settings.

Note: The fans will only be allowed to turn on if the batteries are sufficiently charged. The controllers however, stay on to monitor things. The controller will not allow the batteries to completely be discharged and will wait for the sun to charge the batteries.
It should also be said that if for any reasons the batteries were to become fully discharged or “bad” (2-3 years for older SLA batteries and 5-8+ years for newer LIFEPO4 batteries) the solar panels and charge controller system will not function. They are designed to keep “good” batteries topped off with a charge.
In the event of a malfunction, it is almost always advised to connect each battery to a small commercially available charger intended for a Group U1 SLA or LIFEPO4 type battery to fully charge it and determine that the battery is not faulty, before hooking it back into the system. If you do this, please see the “initializing” the system section of these instructions.
If your Type 2 Controller programming becomes altered and you have problems, please contact us for assistance.
3. What to expect of your Active Ventilation Management system…
Theory… Why an AVM
A key part of maximize growing conditions in your greenhouse is ventilation. Plants (varies by species) and are sensitive to temperature, humidity and Carbon Dioxide (CO²) levels. Remember, plants consume CO² and give off Oxygen (O²)… opposite of us. These parameters are most commonly managed by ventilating your greenhouse. The AVM system is not a heater nor an air conditioner but COULD work in harmony with supplemental heat or air chillers that you might choose to install, to circulate air.
In its standard form, Roost & Root greenhouses allow for PASSIVE ventilation management via manually opened front vent/pollination doors, rear louvered air intake vents or by leaving the main door open. An available optional magnetic closure door screen is available to help keep bigger pests out.
AVM ACTIVE ventilation is achieved by four super quiet IP68 water resistant fans that are digitally controlled and can be activated during any one of three conditions being met. (1) by a time interval for CO²/O² management, (2) high temperature ON and low temperature OFF to assist in maintaining key temperatures… and (3) high humidity on and low humidity off to assist in maintaining humidity ranges. So that you don’t have to run an extension cord to your greenhouse, this is all powered by sealed batteries, re-charged by a solar panel, and digitally managed for unattended continuous operation. Because it is DC powered, there is no risk to you of electrical shock even in a wet environment. Because it is solar powered, it requires sunlight, and direct sunlight to work best.
WE PRESET THE AVM CONTROLLERS AS FOLLOWS WHEN IT LEAVES OUR SHOP
Interval Timer: Run 2 minutes out of every 30 (28 minutes off 2 minutes on) to exchange the air in the greenhouse twice per hour.
Temperature: ON 32°C (about 90°F) and OFF 31°C (about 89°F)
Humidity: ON 95 %RH and OFF 94 %RH
You can reprogram the system to work however you like but it’s a little confusing. See bottom of this page if you decide to change the factory settings. The AVM’s job is to “move air” which can (a) lower temperatures (b) lower humidity, and (c) bring in CO² infused fresh air and exchange O² saturated air for better plant growth performance. Keeping the temperature and humidity hi/low range tight, is required to preserve battery power.
Note: 50 degree outside air on a sunny day will easily make your greenhouse 90 degrees or more inside. Once the temperatures are consistently in the 70’s and 80’s (shorter days) the system will not likely be able to operate continuously… but it is not necessary. It in cooler weather is designed to still exchange the air twice per hour. We size the CFM of the fans to be able to in two minutes, exchange the air in the inside of the greenhouse.
The AVM can be used in conjunction with the passive ventilation features of the greenhouse or instead of passive ventilation. For example, if you were heating your greenhouse, or wanted to capture as much daytime heat as possible, you might choose to block off all passive ventilation features and only use the Active Ventilation System to preserve as much heat as possible but still bring in fresh air periodically.

Battery Warning: SLA and LIFEPO4 batteries overheat after about 140°F. Units manufactured after August of 2023 will actually turn themselves off when the temperature inside the control box exceed 140°F. In the summer, the temperature in your greenhouse can easily climb to 140°F or more if the outside temperature is 100°F or more. You can’t reasonably expect to grow plants in temperatures above 100°F and this is inconsistent with the concept of a greenhouse anyway. We recommend that the batteries be unplugged in the summer “off season” to protect them and extend their lives. We warrant batteries for one year from date of purchase.
4. Changing Interval Timer for CO²/O² Air Exchanges
Note: Photos of screens may not show all the digits because the flicker and the timing seldom catches it.
Again, plants take CO² (carbon dioxide) and give off O² (oxygen) throughout the day. To optimize growing conditions you need to bring in at least 2 greenhouse exchanges of fresh air (by volume) every hour. We’ve done the math for you and if every about 30 minutes, the fans run for 2 minutes, you will more or less exchange the air in the greenhouse twice an hour.
Note: We set this time on time off in our shop and it should be set this way when you power on your AVM.
For the exchange to occur, a source of fresh air must be open. The back wall vents are positioned such that air would be pulled through the greenhouse and out the fans. They each must be left at least 1/2 way open to provide a fresh air source for the fans to draw from. Other options for a fresh air source include the main entry door or the front pollinating doors. This feature makes sure fresh air is drawn in even if the temperature and/or the humidity conditions are optimal and fans are not activated for those reasons.
IF YOU WANT TO CHANGE THE FREQUENCY OR LENGTH OF AIR EXCHANGES (not recommended)
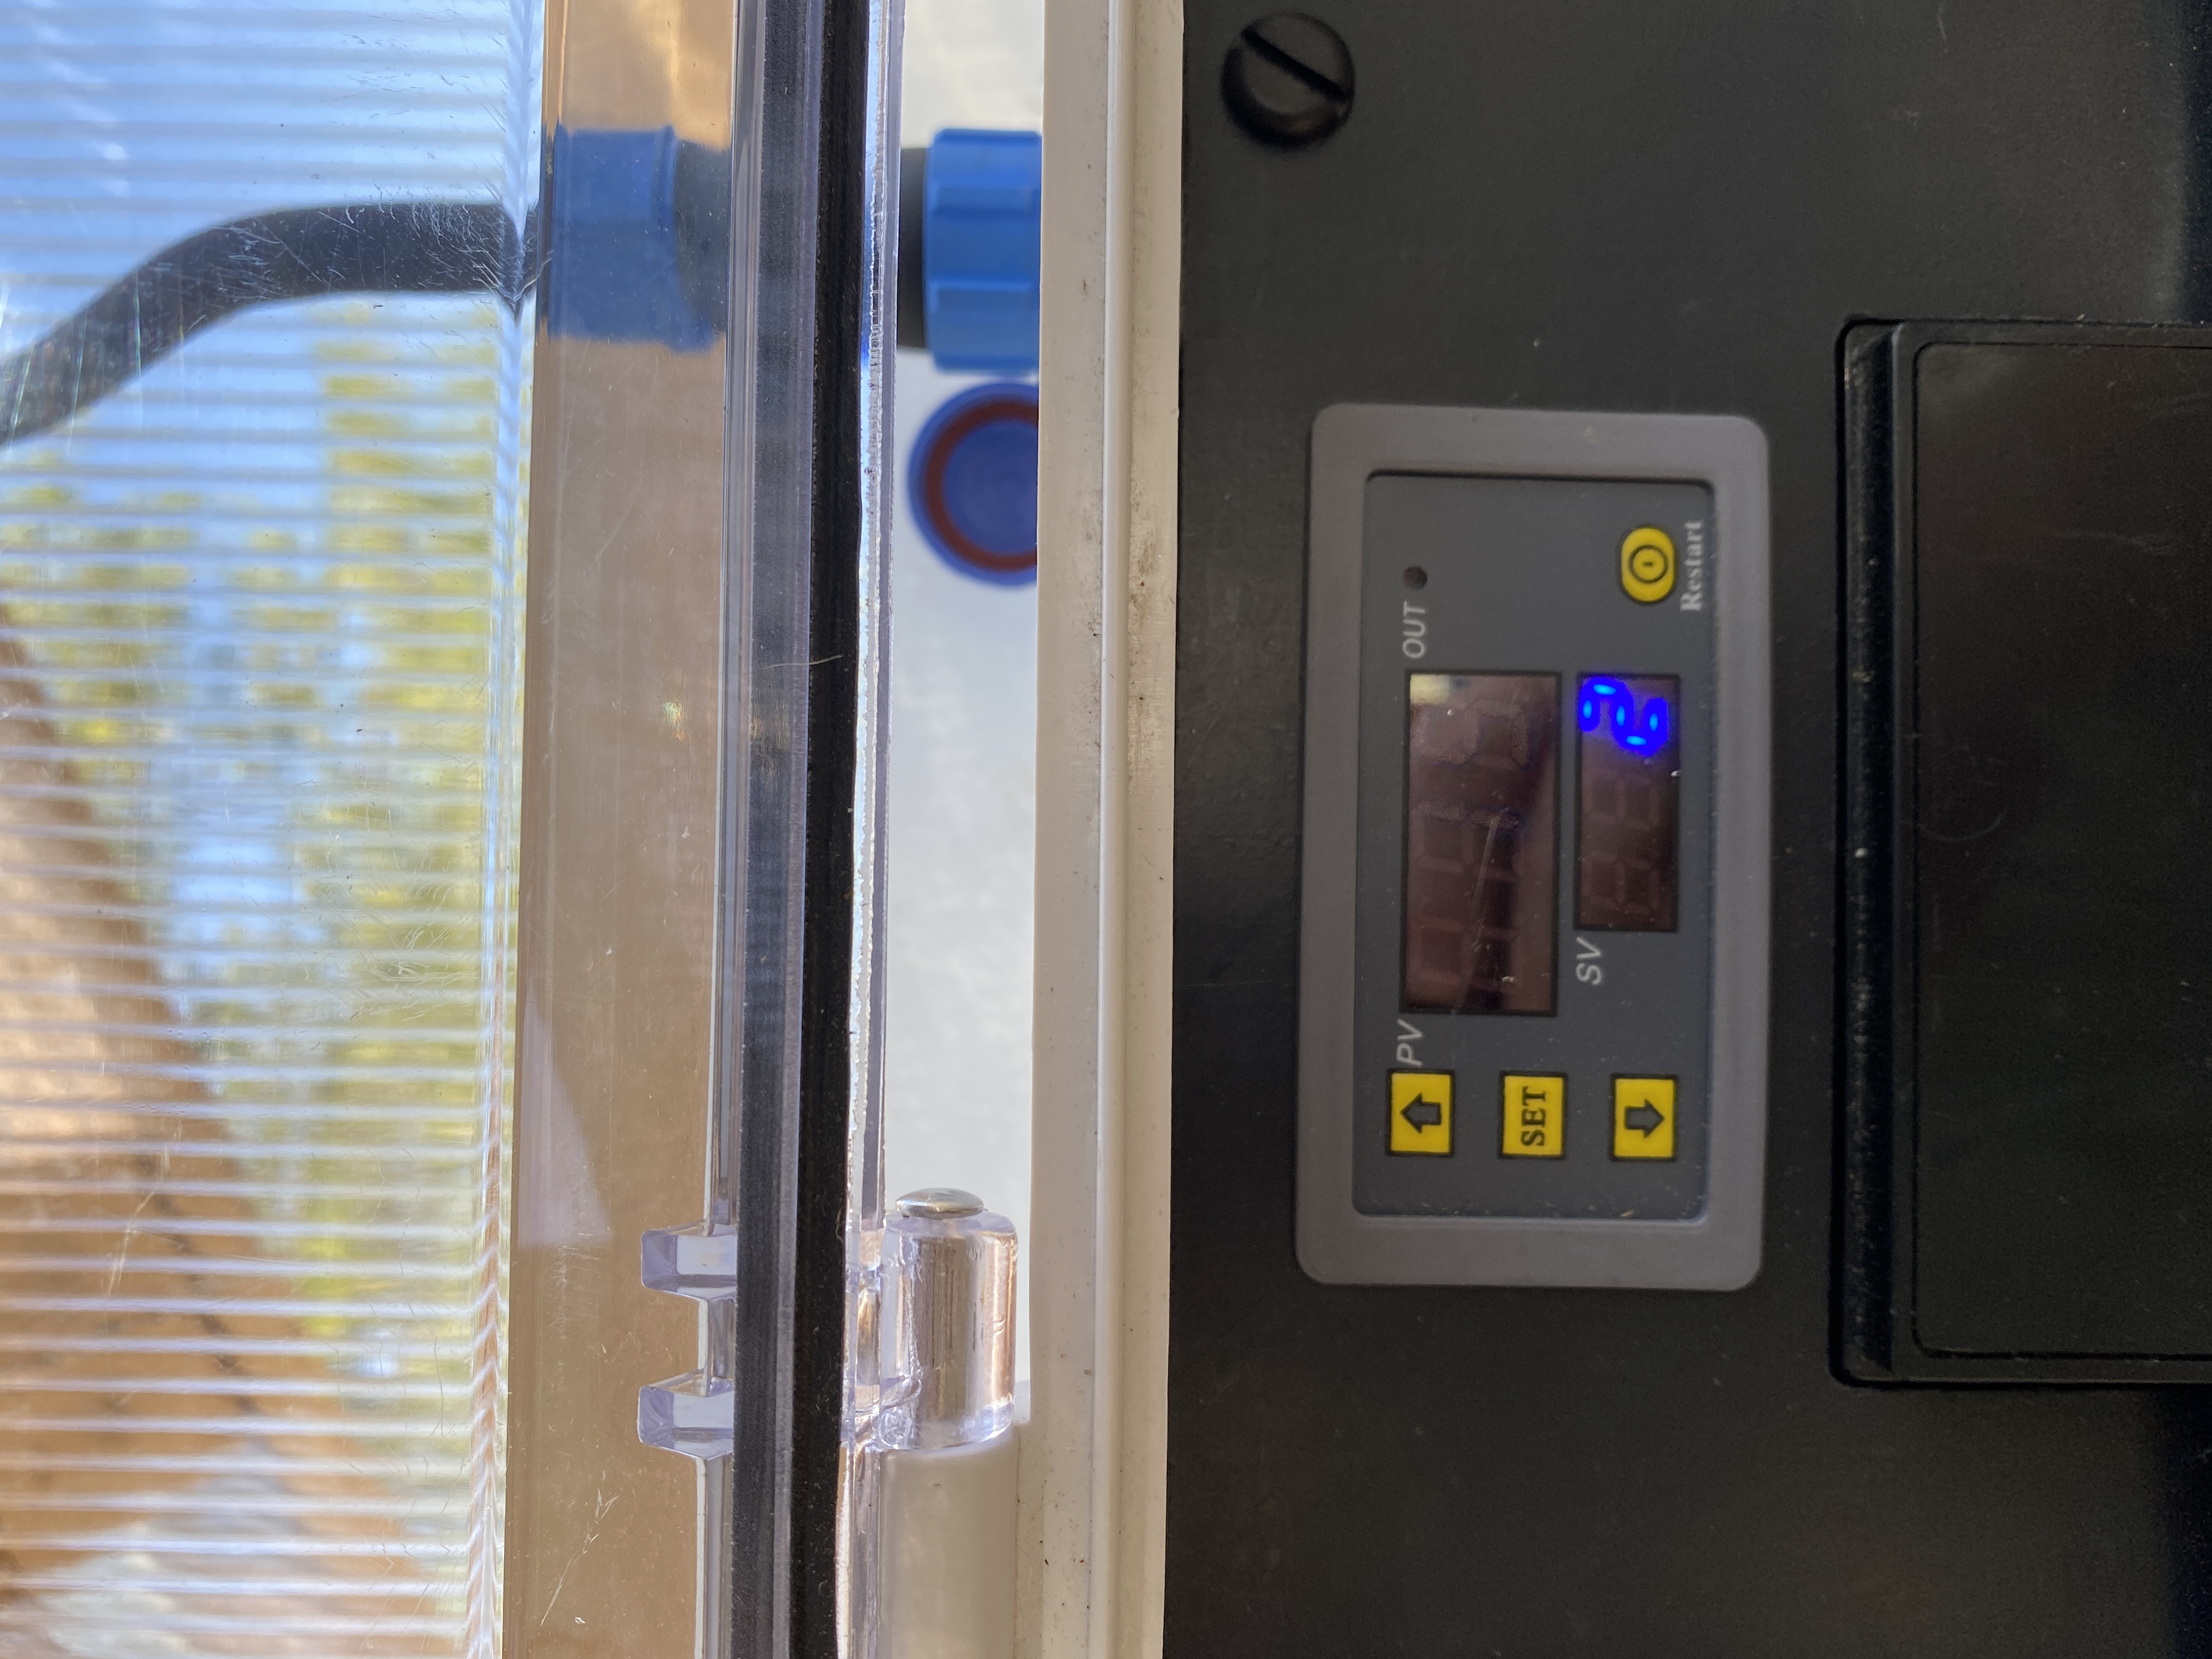
28 Minute OFF Time: Press SET just once and PV (Top Red Number) 28 begins to flash. Press the up or down arrows to increase or decrease the minutes the system will be OFF. Wait about 5 seconds and the system will return to its normal operating condition.
2 Minute ON Time: Press SET twice and SV (Bottom Blue Number) 2 begins to flash. Press the up or down arrows to increase or decrease the minutes the system will be ON. Wait about 3-5 seconds and the system will return to its normal operating condition.
Too aggressive of a setting will kill the batteries. Even as it is… 24 hours x 60 minutes / 28 Minute Interval = ~ 50 2 minute runs or about 100 minutes every 24 hours…. 50 air exchanges a day. That’s enough ventilation for most plant species no matter what.
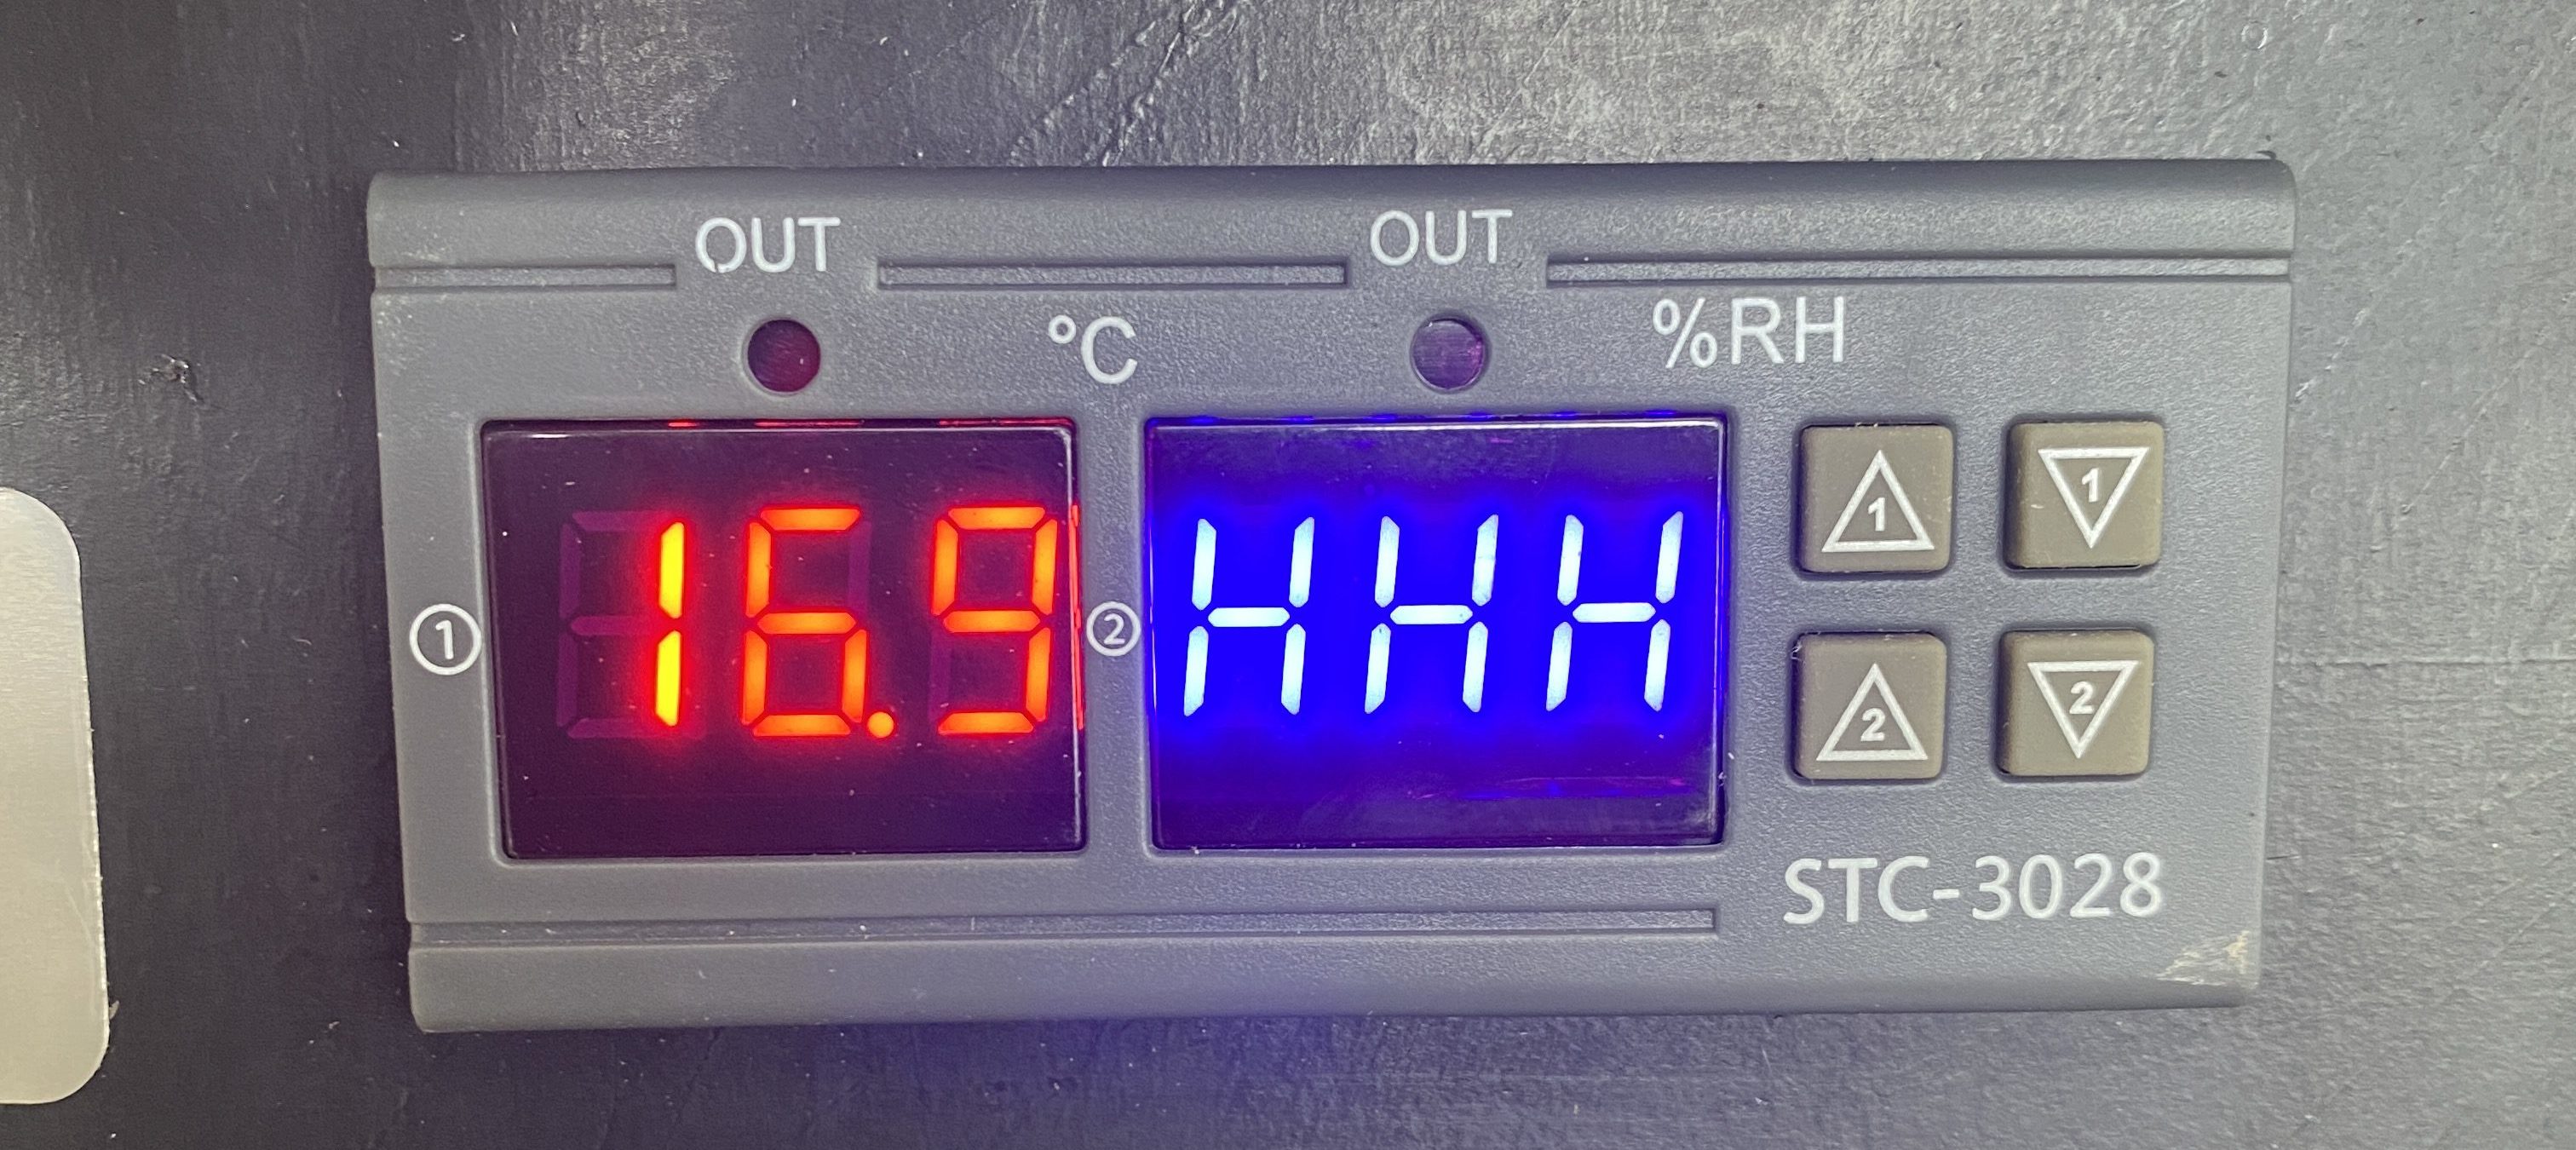
Note: If you accidentally mess up the timer function settings or the timer becomes confused and displays 999’s first try pushing “restart” and see if the timer will reset. Otherwise, see “Re-Programming Video” at the end of this document if you need to reprogram the interval timer.
5. Changing Hi/Low Temperature Ranges
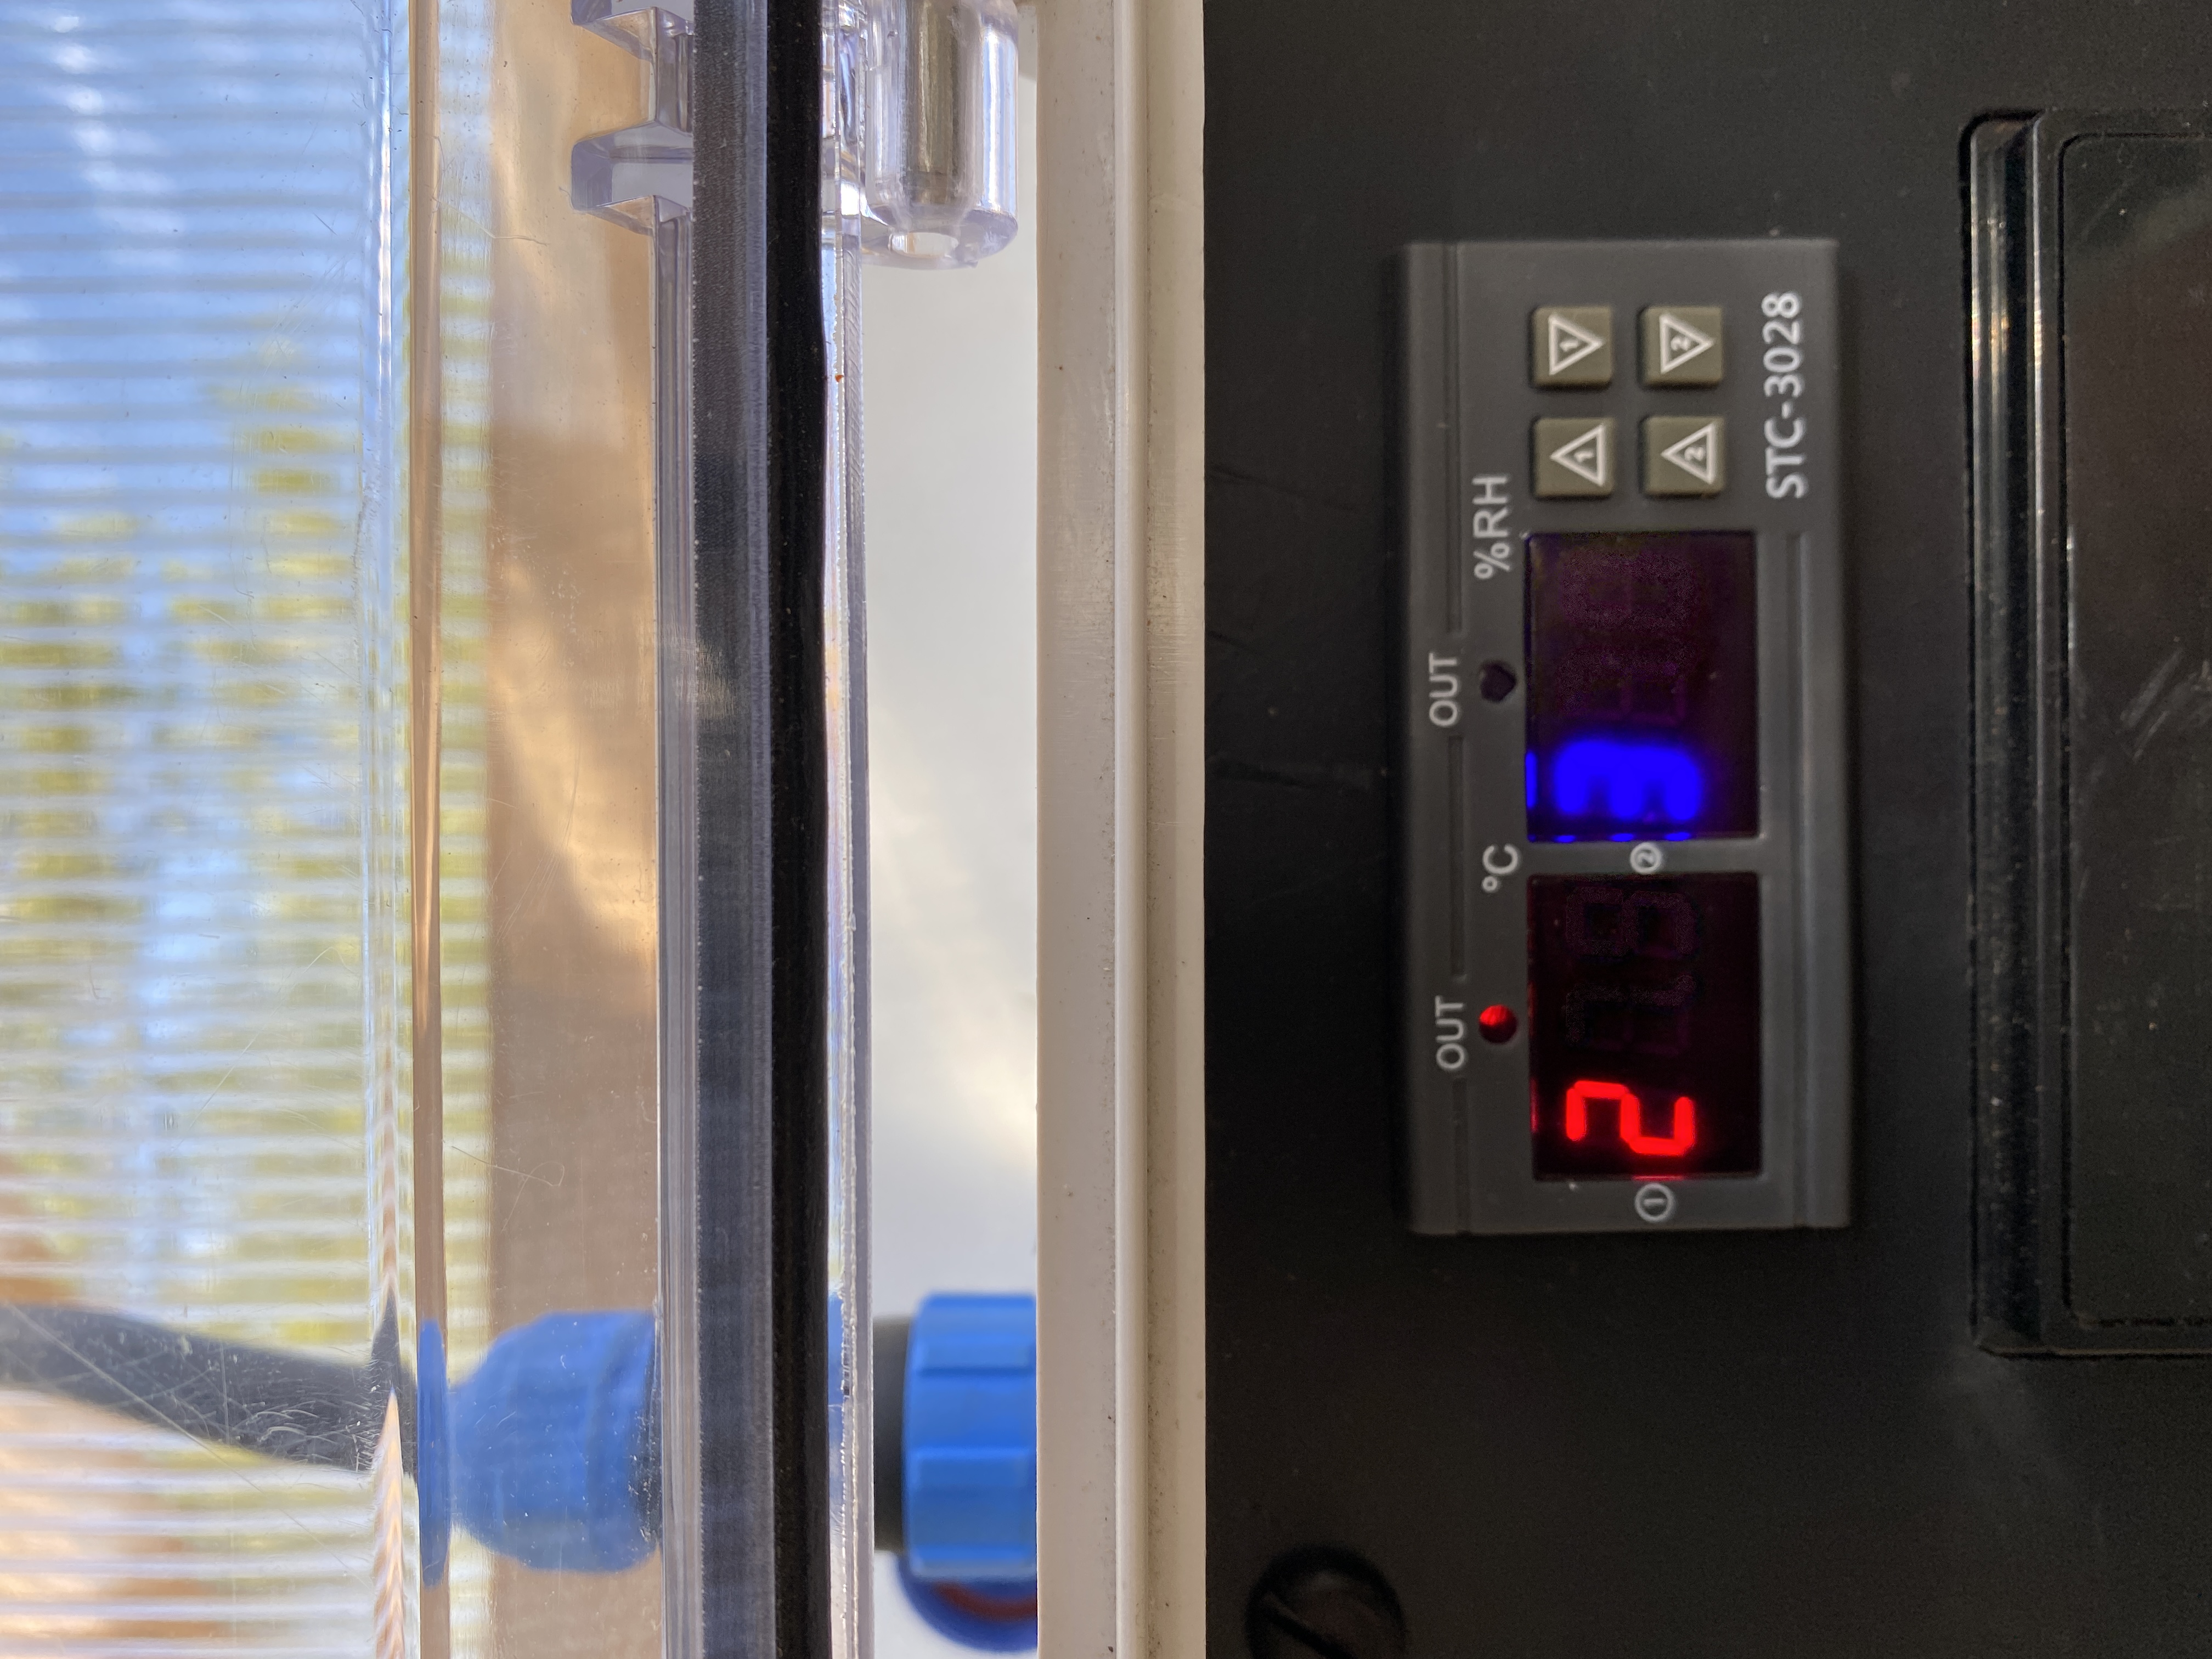
The system comes preset to ON at 32°C (about 90°F) and OFF at 31°C (about 89°F) Note: A quick Google search for “F to C” will convert any Fahrenheit temperature you are aiming for to Celsius. Temperature is displayed on the left side in red values.
Change ON Temperature: (1) Hold down the “1 Up Arrow” for 3 seconds and release. This will display the factory default temperature of 32°C and be blinking. (2) Quickly push the “1 Up Arrow” or the “1 Down Arrow” to raise or lower the ON temperature of the AVM system fans. Wait about 3-5 seconds and the system will return to its normal operating condition.
Change OFF Temperature: (1) Hold down the “1 Down Arrow” for 3 seconds. This will display the factory default temperature of 26°C. (2) Quickly push the “1 Up Arrow” or the “1 Down Arrow” to raise or lower the OFF temperature of the AVM system fans. Wait about 3-5 seconds and the system will return to its normal operating condition.
6. Changing Hi/Low Humidity Ranges
The system comes preset to ON at 95 % Relative Humidity and OFF at 85 % Relative Humidity. The humidity is displayed on the right side in blue values.
Change ON %RH: (1) Hold down the “2 Up Arrow” for 3 seconds. This will display the factory default of 95 %RH. (2) Quickly push the “1 Up Arrow” or the “1 Down Arrow” to raise or lower the ON Humidity value of the AVM system fans. Wait about 3-5 seconds and the system will return to its normal operating condition.
Change OFF %RH: (1) Hold down the “2 Up Arrow” for 3 seconds. This will display the factory default of 85 %RH. (2) Quickly push the “1 Up Arrow” or the “1 Down Arrow” to raise or lower the OFF Humidity value of the AVM system fans. Wait about 3-5 seconds and the system will return to its normal operating condition.
7. Re-Activating (re-booting) the AVM System
If the system stays in hibernation too long from lack of sufficient light or malfunction the charge controller can become confused as to what voltage its trying to manage and may need to be re-activated. Sort of like rebooting a computer.
Perform these steps in this order…
- From a ladder, disconnect the 2 pin connector from the Solar Panel that plugs into the grey square box on the fan panel. Green light on right side of charge controller should go out.
- Disconnect either both positive wires from each battery or both negative wires… does not matter. Twist aside a little where they are for sure not touching. Middle red light should go out.
- Gently unscrew the collar of the blue 4 pin connector on the grey fan panel box and unplug the main cable.
Best case scenario would be to now manually, independently, recharge each of the batteries fully using any small automotive or motorcycle 12V battery charger with clip leads correctly connected to the + or – battery terminals. If required, choose the SLA or Gel setting or Lithium setting depending on your battery/controller type. You can still try rebooting the system without doing this but it would be best.
🔗Here’s an example of a small charger that would do the trick…
Next…
- Reattach battery connectors… wait for at least 60 seconds before next step.
- Reconnect the blue 4 pin connector on the fan panel box. Fans might start up so keep clear of them.
- Plug back in the 2 pin connector from the Solar Panel.
If you recharged your batteries fully before starting this procedure, it’s likely working correctly right now. If you did not, you will need to give it up to 24 hours after this to see system corrects itself. If the interval timer is confused after rebooting, press the “restart” button on its face and it should be restored to the factory settings.
If this does not remedy your problem use our support page and we’ll help you troubleshoot or send replacement parts as required.
8. Cold Weather Use – AVM System Batteries
9. Replacing the Batteries
- Any ML15-12 volt type battery will work. Battery type must match your controller type… SLA battery for Type 1 controllers and LiFePo4 batteries for Type 2 controllers. If you buy a LiFePo4 type battery make sure it has a BMS (battery management system) built in. Most do.
- Dimensions: 5.94 inches x 3.86 inches x 3.98 inches. Terminal Type: F2
10. VIDEO- Reprogramming Interval Timer or Temperature / Humidity Controllers
11. Maintenance
Other than keeping your solar panel clean, there is no particular maintenance of the unit. The fans should be kept clear of debris and can be gently washed with plain water. They are IP68 moisture rated. The control box should be wiped clean with a damp cloth to be kept dust free.
Make sure that dirt daubers or other insects do not block the vent holes on the sides of the unit. If they did, the holes should be cleared.
Batteries should be disconnected in the summer non-growing season when daytime temperatures are consistently exceeding 90°F as the inside temperatures of the greenhouse in the daytime rise so high that they can damage the batteries.